Eyebrow Lamination: The Ultimate Guide
Learn everything you need to know about one of the most popular treatments for trendy eyebrows in this in-depth explanation of brow lamination.

Image source : PMUhub
Explore more brow lamination topics:
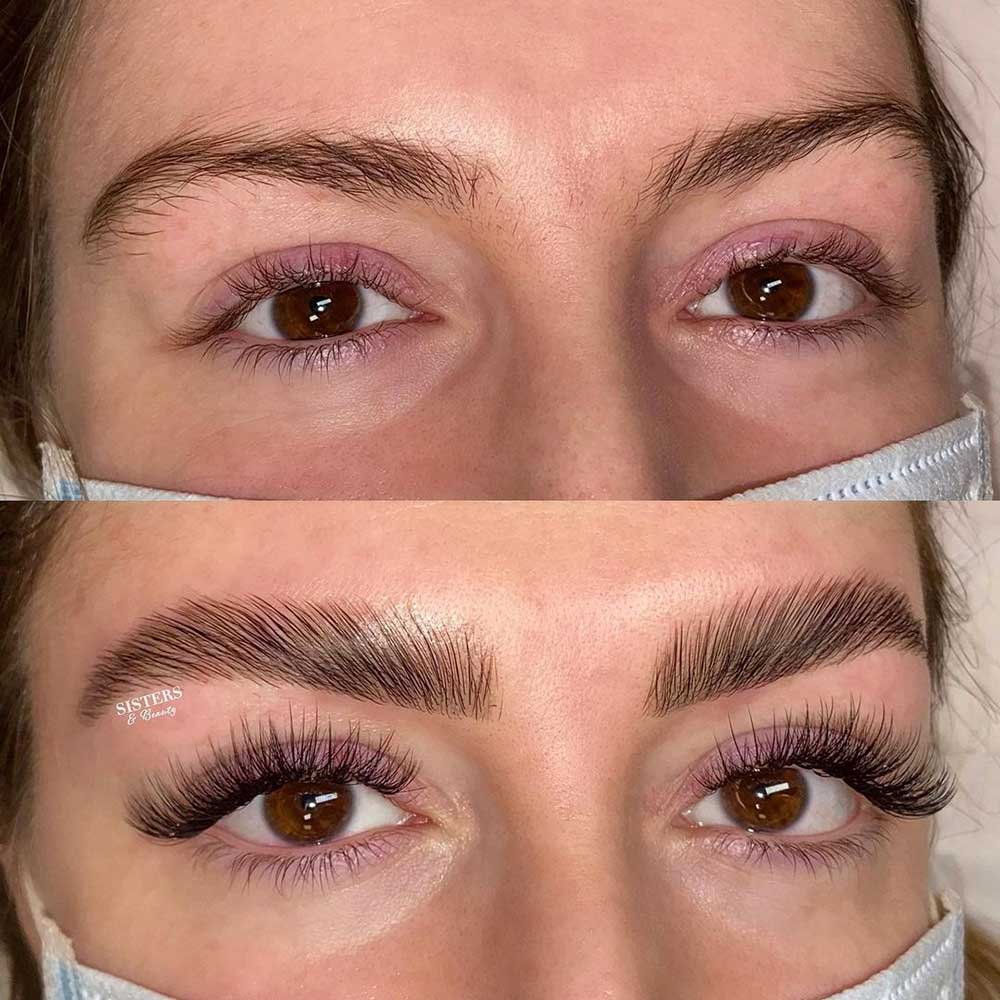
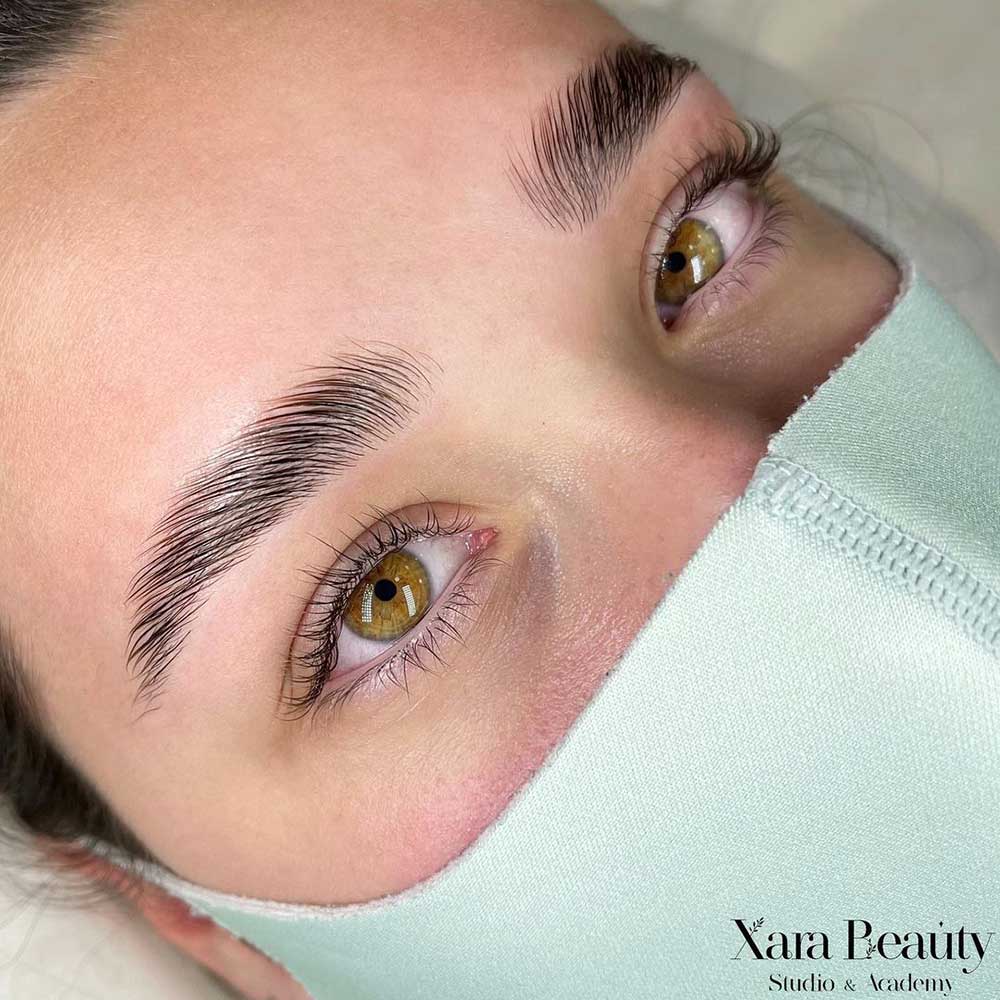
Brow lamination has been around for some time now, yet it remains one of the most popular brow procedures. People all around the world are loving the look of laminated brows – thick, defined arches with uplifted brow hairs fixed perfectly in place.
It’s contemporary and works on pretty much any brow shape and thickness.
So if you’re interested in getting the so-called brow perm, here’s a detailed guide through all you need to know about the brow lamination procedure!
What Is Brow Lamination?
Eyebrow lamination emerged as a brow styling trend when makeup artists and beauty influencers started using various products such as thick brow gels, different adhesives, and even soap to uplift brow hairs and keep them in place.
Soon, brow techs quickly came up with a treatment that will recreate this soap brow look more permanently – not only lifting the hairs but also straightening and tinting them.
Laminated brows are achieved by applying two types of chemical solutions onto the brow hairs. The hairs are first relaxed and then fixed into shape with a neutralizing solution.
Basically, it’s a gentle perm for your eyebrows, but the point is to straighten them and make them easy to fixate in an upwards position, so the arches appear thicker.
So brow lamination is a procedure that will give you a super trendy look, fix all your brow insecurities and keep your arches easy to style for up to 6 weeks.
What Are the Benefits of Brow Lamination?
Brow lamination is a great solution for a number of brow problems and insecurities – plus it’s super practical, as the results last relatively long. Some of the benefits of eyebrow lamination include:
- Makes your brow arches thicker
- Gives your brows more volume
- Shapes your arches in a trendy, tidy yet fluffy shape
- Puts hairs that grow in different directions in place
- Hides sparse patches or gaps
- Lasts up to 6 weeks
- No smudging
- Time saver (no daily makeup application)
- Easy, low-maintenance way to style your brows
- Can be tailored to your preferences (you can get a more or less dramatic look)
- Non-invasive, painless procedure

Who Is Brow Lamination Best Suited For?
As we mentioned, brow lamination is a great option for anyone who is looking to enhance their brows.
But it’s important to note that while this is a pretty bespoke treatment, people prone to certain skin conditions aren’t the best candidates for brow lamination, as the chemicals might set off their conditions and put them at a higher risk of developing the side effects.
So in case you suffer from any of the following conditions, you might want to consult with your dermatologist before trying out laminated eyebrows:
- Eczema
- Rosacea
- Generally sensitive skin
- Proneness to contact dermatitis
This list should also include pregnant and breastfeeding women, as the treatment involves the use of chemicals that have the possibility to enter the bloodstream. You can find out more about that here.
Does Brow Lamination Work Equally Well on Everyone?
We should also note that part of the eyebrow lamination limitations and a notable factor of how successful results are is the type of brow hairs you have.
Coarser hair may require a longer time to process or stronger products than finer hair does.
Is Brow Lamination on Thick Brows Possible?
Yes! In fact, the best brow lamination results are achieved with thick, voluminous brows. The more hairs you have and the thicker they are, the wider and more dramatic the arches.
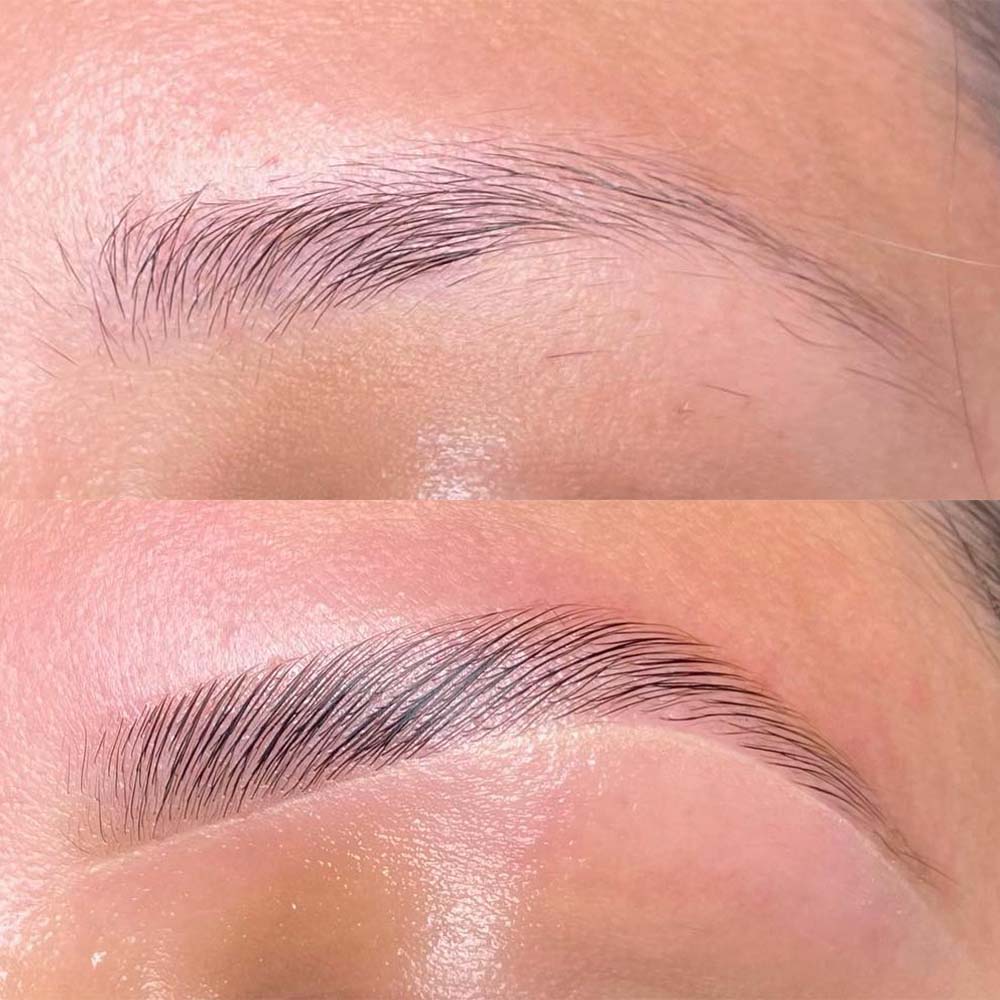
Is Brow Lamination on Sparse Brows Possible?
Again, yes! If your brows are sparse or are thinning for whatever reason, you can achieve great results through brow lamination nevertheless thanks to the tinting step.
Eyebrow tint will color the thin, barely visible hairs and make the arches seem fuller.
What Does the Eyebrow Lamination Procedure Look Like?
Brow lamination is a simple process, but it does involve several steps. Here’s what you can expect when you come in for your appointment:
Preparation
First, you will have a chat with your brow tech about your brows goals. They will clean your brows of any makeup or other products and assess your brows.
Together, you will decide if you need any extra steps after the lamination itself, like tinting or waxing. They should also do a patch test to make sure your skin doesn’t react to the chemicals.
Straightening the Brows
The brows are then brushed and combed in the desired direction.
A chemical solution in the form of a cream is applied onto the brows – it creates a chemical reaction that breaks down the bonds in the hairs and relaxes each one, so they’re straightened and look longer.
A plastic wrap is then put over the brows so the solution can do its eyebrow straightening magic.
How long the wrap will stay on depends on the curliness and thickness of your brows, but 5 minutes is enough for most clients. You might feel a tingling sensation, but nothing too uncomfortable.
Setting them Into Shape
The straightening formula is then cleaned off, and your brows are now soft and easy to manipulate. The tech brushes them into the desired shape and direction, and a fixing solution is applied that will set the hairs into shape.
Optional: Tinting and Shaping
Your brows have now been successfully laminated! The procedure can be finished off by quick tinting if you feel your brows are too light, or you want more volume.
Tinting will color even the thinnest baby brow hairs, so the brows will look much fuller.
If you want to get rid of any hairs you feel are out of place, your tech can remove them by plucking, threading, or waxing.

Nourishing
At the end of the treatment, nourishing oil is applied to the brows to moisturize the hair and the skin.
You will also be given aftercare instructions you should follow to ensure the longevity of your new brows. There isn’t really much maintenance involved, but pay attention to what your brow tech suggests.
So, How Long Does the Brow Lamination Procedure Last?
You should be in and out of the salon within 1 hour.
Brow lamination is a relatively quick treatment. The lamination part itself takes about 15 minutes, but the length of the appointment depends on whether you’re having additional work done, like tinting and waxing.
How Long Will Laminated Brows Last?
The effects of brow lamination last between 5 to 8 weeks, but for most clients, it’s 6 weeks.
There are a lot of factors that contribute to the longevity of results, mainly how well you’re following the aftercare instructions, as well as your lifestyle.
You can find out more about what to realistically expect from the results here.
In case you don’t like your brow lamination results, learn how to reverse the effects here.
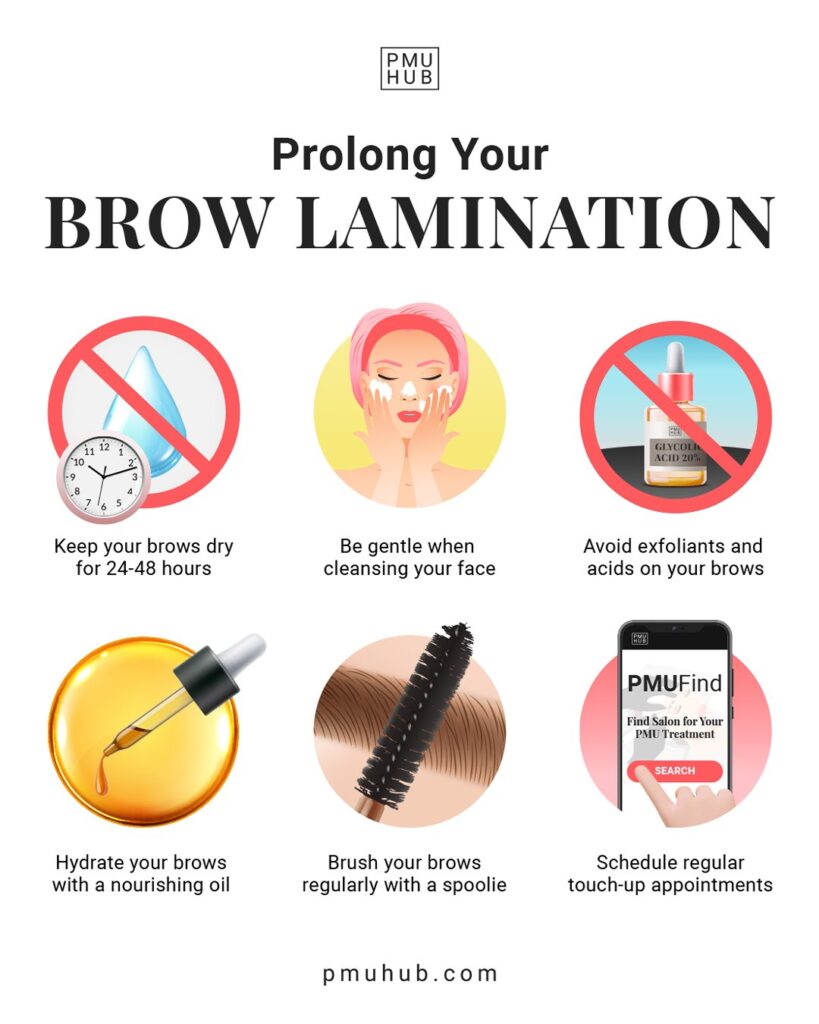
What Is Brow Lamination Aftercare Like?
Brow lamination aftercare is quite simple and straightforward – you mustn’t expose your brows to sunlight or get them wet for 24 hours after the treatment (this includes avoiding saunas and steam baths, or any other activity that causes excessive sweating).
Also, avoid using active ingredients over the treated area for 3 days after your treatment, and don’t exfoliate the area mechanically.
After that, you can pretty much carry on with your normal routine but try to touch your brows as little as possible. You can tidy them up with a spoolie each morning if you feel the need to.
Most techs advise moisturizing your brows with an oil every day, as the chemicals can be drying and the hairs could use some hydration.
Is There any Preparation for the Brow Lamination Procedure?
There is no particular pre-care or preparation for eyebrow lamination.
It is advisable, though, to let your brows grow out for at least 3 weeks prior to the treatment, so the hairs are as long as possible and in their natural state.
So leave any stray hairs you might usually pluck out be – the more hairs you have the better the results will be, and they’ll be put in place at the appointment.
Is Brow Lamination Safe?
Getting your brows laminated is completely non-invasive, so it’s generally considered completely safe and painless.
There is no trauma done to your skin, so there is no downtime.
You should bear in mind, however, that if you repeat the treatment too often, it might gradually cause dryness and damage to your brow hairs due to a chemical called ammonium thioglycolate which breaks down the bonds in the hair.
Are There Any Risks and Side-Effects to Brow Lamination?
Although this procedure is safe, there still are some risks and side effects you should be aware of before booking to avoid any gone-wrong scenarios.
Most of them are tied to the use of chemicals that can irritate the skin, especially thin and sensitive areas around the eyes.
So possible side-effects could be:
- Redness
- Itchiness
- Swelling
- Skin flaking
- Dryness
- Hair damage or hair fallout
You can learn more about these risks by following this link.
Other risks include the possibility of eye irritation if the chemicals get in your eyes, but a skilled technician won’t let any of this happen.
They will do a patch test to make sure the chemicals won’t cause an allergic reaction.
How Much Does Brow Lamination Cost?
The price of brow lamination can vary from salon to salon, but the range is between $50 and $150. The brow lamination cost can also vary depending on if you’re getting tinting and waxing or not.
Can I Do Brow Lamination at Home?
DIY brow lamination is possible – and actually a very popular option!
Getting laminated brows at home is a good, budget-friendly option for those who prefer to do beauty procedures by themselves. Just keep in mind the results may not be as satisfactory as they would be if you go to a salon.
You’ll need a brow lamination kit. The price of the kit varies, but it’s generally under $50. They come with all the necessary tools, supplies, and instructions.
Once you’ve acquired the supplies (kit, cling film, and cotton pads), you can begin your at home brow lamination process.
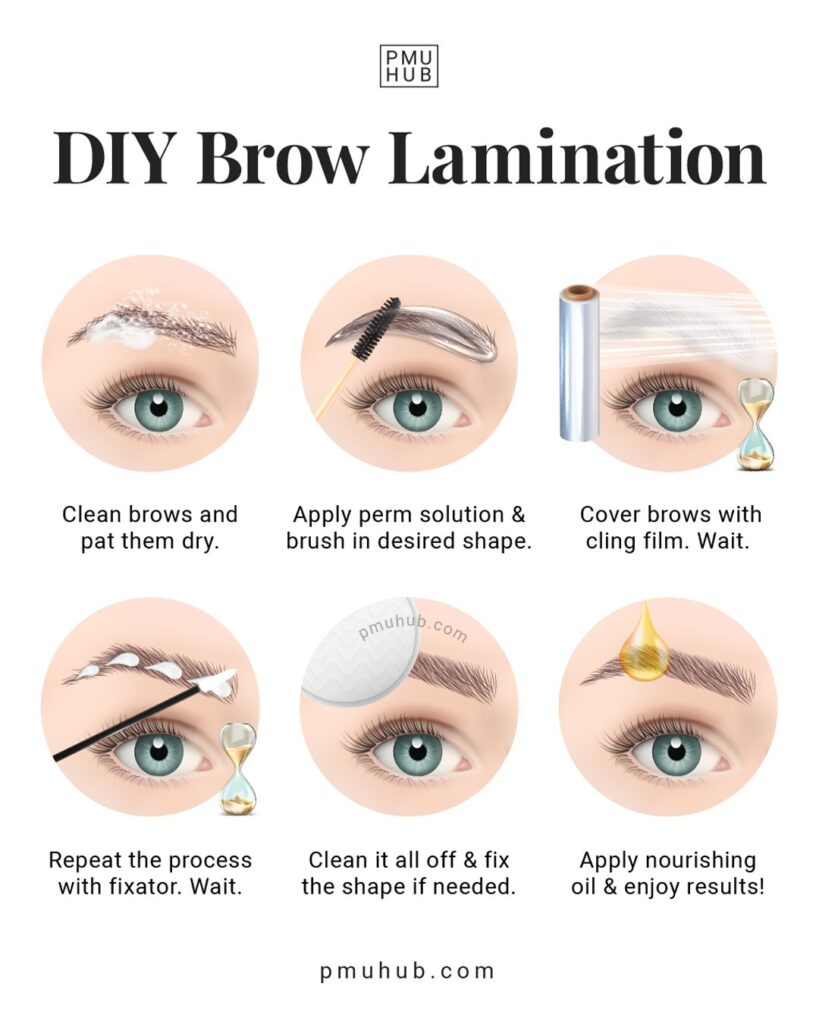
Although each kit comes with its own instructions, the general process is the same:
- The first step is cleansing to remove any oils, makeup, and debris from the area which allows products to get a better grip on the brow hair.
- Optional step that’s recommended by some brands is gluing the brows down with the provided or lash glue so the brows are already shaped before even the first solution is applied.
- Then, comes the first solution – perming solution – which is kept on the brows for a few minutes. A lot of brands recommend covering the hair with a cling film to allow better hair processing.
- Then after you’ve waited long enough, you’re removing that solution and repeating the same process with the fixator aka setting solution.
- Next step is also optional – if you desire darker brows this is the part of the process where you should grab your DIY brow tint kit and do that. Read step-by-step instructions for DIY brow tinting here.
- Final step is cleaning everything off and applying a nourishing oil to help keep your brow hairs healthy.
Brow Lamination – Main Takeaways
Brow lamination is a great treatment for anyone who wants to improve their brow shape, get a trendy brow style, or hide any imperfections like sparse patches or thinning brows.
It’s also an excellent choice for anyone who doesn’t want the daily hassle of applying brow products, but who’s reluctant to commit to permanent makeup for brows.
It lasts up to 6 weeks plus it’s a quick, generally safe procedure that won’t break the bank but will definitely boost your confidence!
weekly insight into PMU insdustry
Subscribe to our FREE newsletter. 100% good stuff.

support us so we can keep providing you with free education , information and inspiration.